
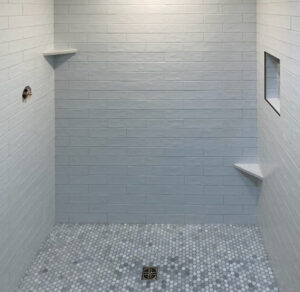
Tile is one of the most durable surfaces in any home, but only when it is installed correctly. This page covers what professional tile installation involves at Tessera Contracting the process, the materials, and the standards that separate a floor that lasts decades from one that fails early.
What Our Tile Installation Service Covers
We install and repair tile across floors, backsplashes, fireplaces, showers, bathrooms, kitchens, and laundry rooms, for both residential and commercial properties. Tile is especially well suited to high-traffic areas like foyers, kitchens, and bathrooms, where its hardness and water resistance outperform softer flooring. Our service flow runs in four steps: an estimate, tile and grout purchase through referred providers, installation, and clean-up.
The installation work itself is staged carefully. We begin with subfloor preparation the single most important step in any tile job, because a flat, rigid substrate is what keeps tile from cracking, lifting, or developing lippage down the line. Where existing tile is present, the old floor must be chiseled out before new work begins. From there we move through layout, cutting and setting tiles with attention to spacing and alignment, then grout application, sealing, and curing.
Material selection drives a lot of the planning. Porcelain has a lower water absorption rate than ceramic, making it the better choice for bathrooms and showers. Natural stones behave differently: travertine is porous and needs sealing for long-term upkeep, and slate is denser but still demands more maintenance than ceramic or porcelain. Stone also raises the bar on the substrate for natural stone, the subfloor must be twice as rigid as what ceramic or porcelain require. We also mix tiles from several cartons as we set, because shade variation is inherent in ceramic and blending cartons produces an even, intentional look across the finished floor.

Standards, Quality, and Why It Matters
Tile installation is a craft governed by published standards. Quality work follows the TCNA Handbook for Ceramic, Glass, and Stone Tile Installation and applicable ANSI standards, which define everything from substrate flatness to bond coverage. The Ceramic Tile Education Foundation publishes 15 standards-based tile installation resolutions for 2026, and the NTCA recently named its Five-Star Project of the Year winners at Coverings 2026 in Las Vegas both signals that the industry continues to raise the bar on what professional installation should look like.
“Subfloor preparation is the most important step in any tile installation.”
That standard matters because the alternatives carry real risk. A 2019 Clemson University and Tile Council of North America study tested 25 plastic-based flooring products advertised as waterproof or water resistant using ASTM G21-96 (2015). 88% of those products carried warranties disclaiming damage from mold or excessive moisture, and 100% supported mold growth across three test repetitions while the ceramic tile tested did not support mold growth at all. Mold on flooring can release spores, mycotoxins, and microbiological volatile organic compounds, so the choice of surface has health implications, not just aesthetic ones.
The case for hiring a professional comes down to time and tolerance for error. DIY tile work can stretch over many months without sufficient commitment, and most guidance is clear that delaying a project is preferable to a rushed DIY job. Customers consistently value installers who show up on time and explain the job clearly before starting work and they often hire the same crew back for additional rooms. That is the standard we hold ourselves to.
If you are weighing a tile project, the trade-off is straightforward: cheaper materials and shortcuts on prep almost always cost more later in repairs. The next step is an estimate we will walk the space, talk through material options, and give you a clear plan before any work begins.